Strat Salvage (part 1)
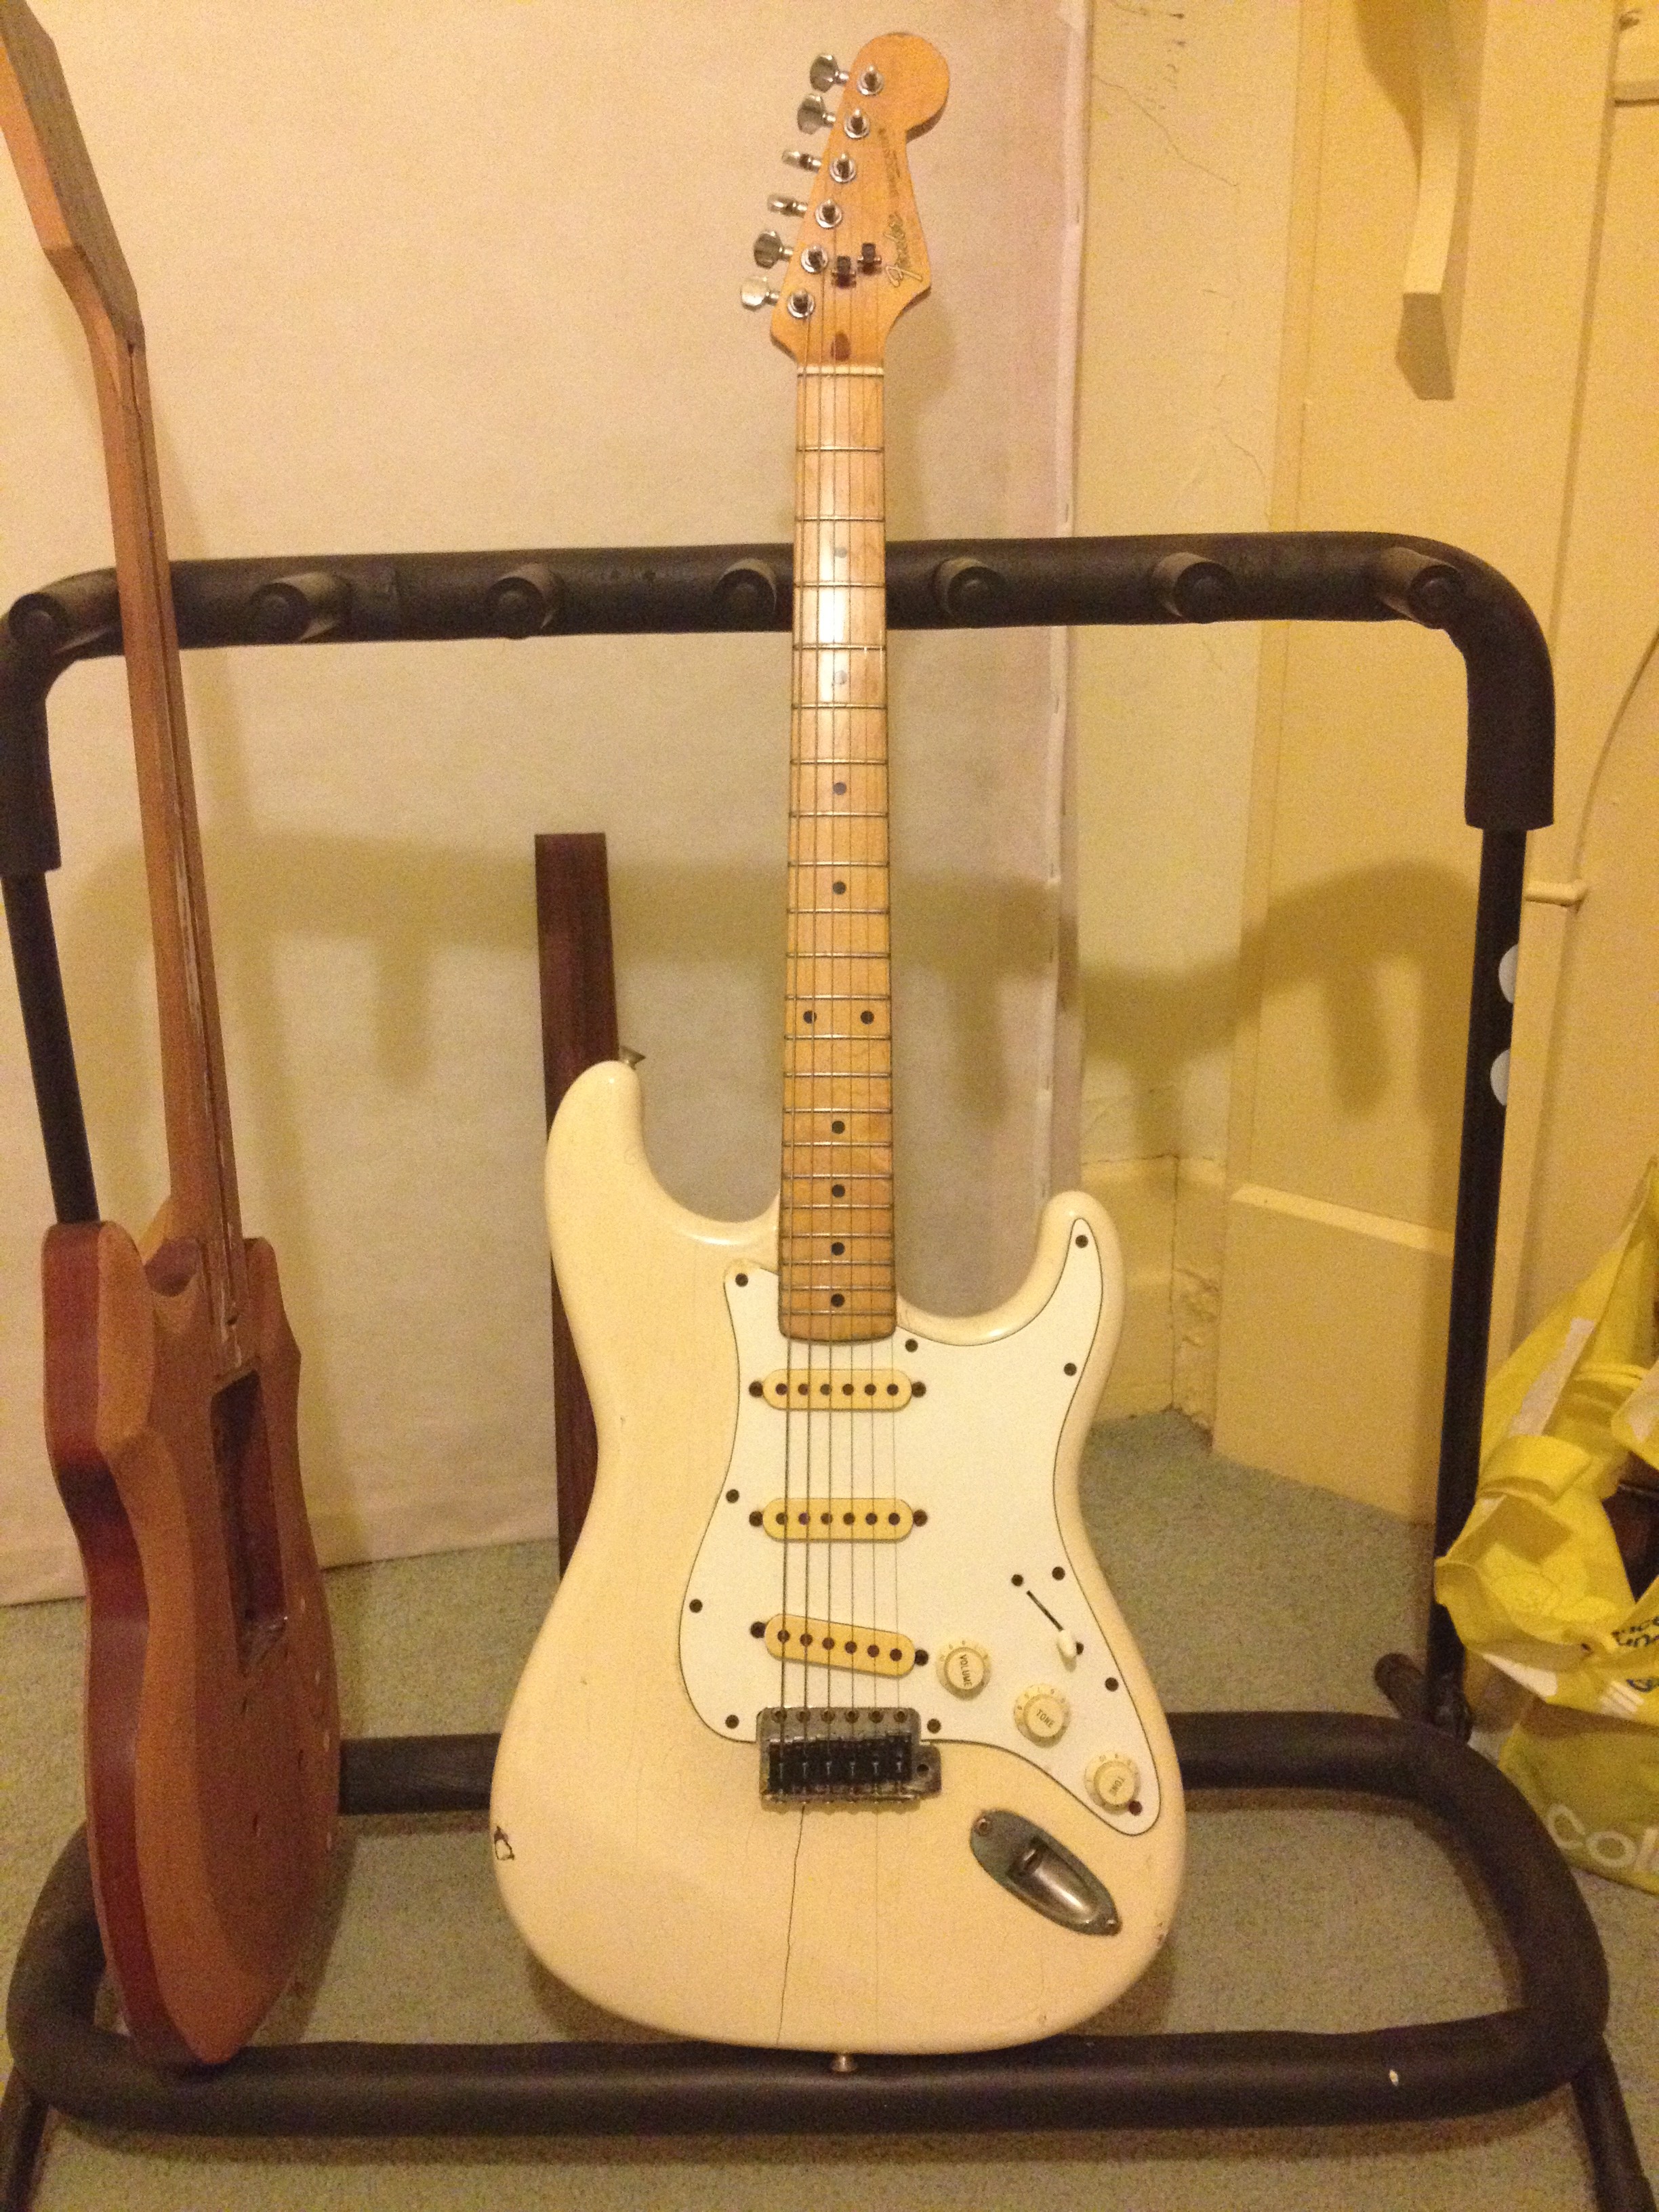
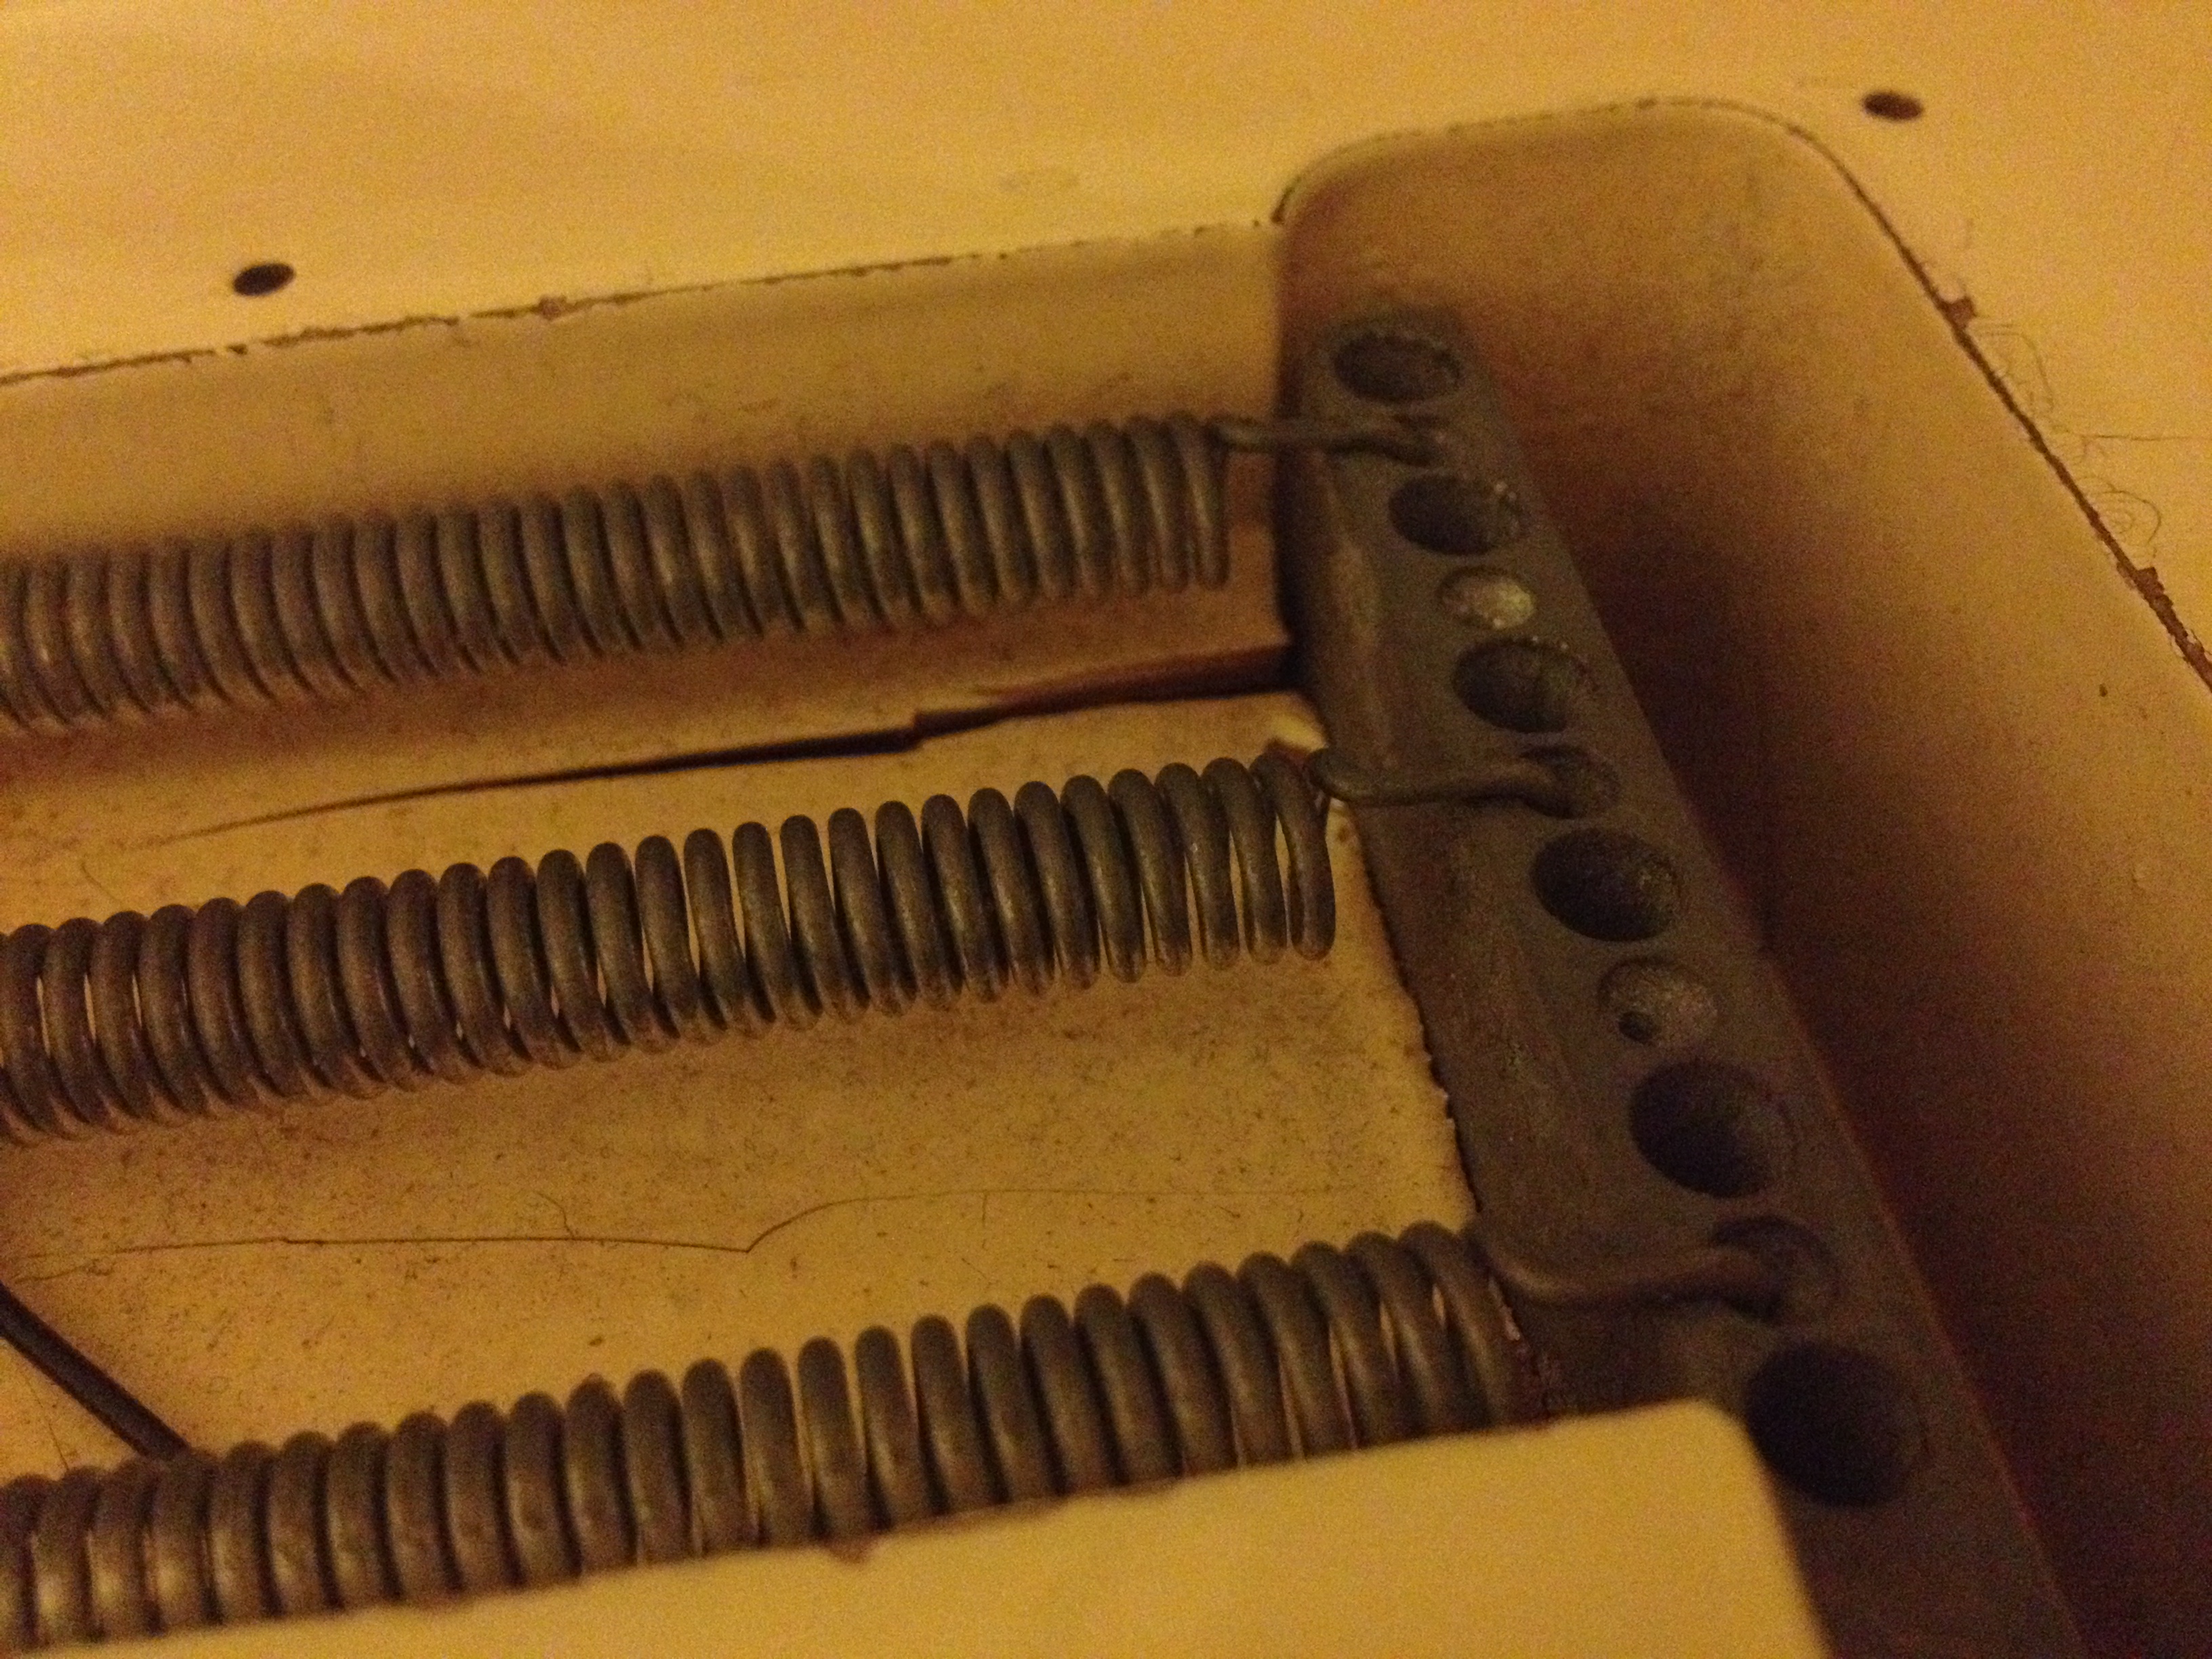
My friend and musical comrade @misterrascal arrived at my place a couple of weeks ago with a 1985(ish) Japanese Fender Strat in tow that he’d used a little too freely onstage over the last few years. A further slight knock and the body would’ve split in two – that’s not an exaggeration – there was a gigantic crack that ran from the neck pocket to just above the strap button (yes, the one behind the bridge). Furthermore, an entire section of wood attached to the bridge had disengaged itself from the rest of the body, producing about an inch of nothingness between the strings and the fingerboard at the 21st fret. I think it was hanging together thanks only to the trem springs…
All in all, this seemed like a worthy salvage job: a case where a sane person would have simply bought a new body, but in what way is that fun? With nothing really to lose, I proceeded.
Proof that the guitar was somehow staying together of its own accord.
Step 1 – identifying the extent of the problem
Thankfully the neck was in reasonably good shape. I probably won’t do anything with it other than a quick clean before bolting it back on. There are a couple of divots in the wood where it looks as though @misterrascal mistook the term “hammer-on”, but despite that, the frets are OK. For now.
It was decided that it wasn’t worth salvaging the blonde finish; it looked like a boiled egg that had rolled off someone’s plate. Stripping this back to bare wood would also provide an opportunity to eyeball any other body cracks that may have been concealed under polyurethane. The gamble of course was that the quality of the repair couldn’t be guaranteed without seeing the extent of the problem, and without that guarantee planning on a plain timber finish = somewhat unwise.
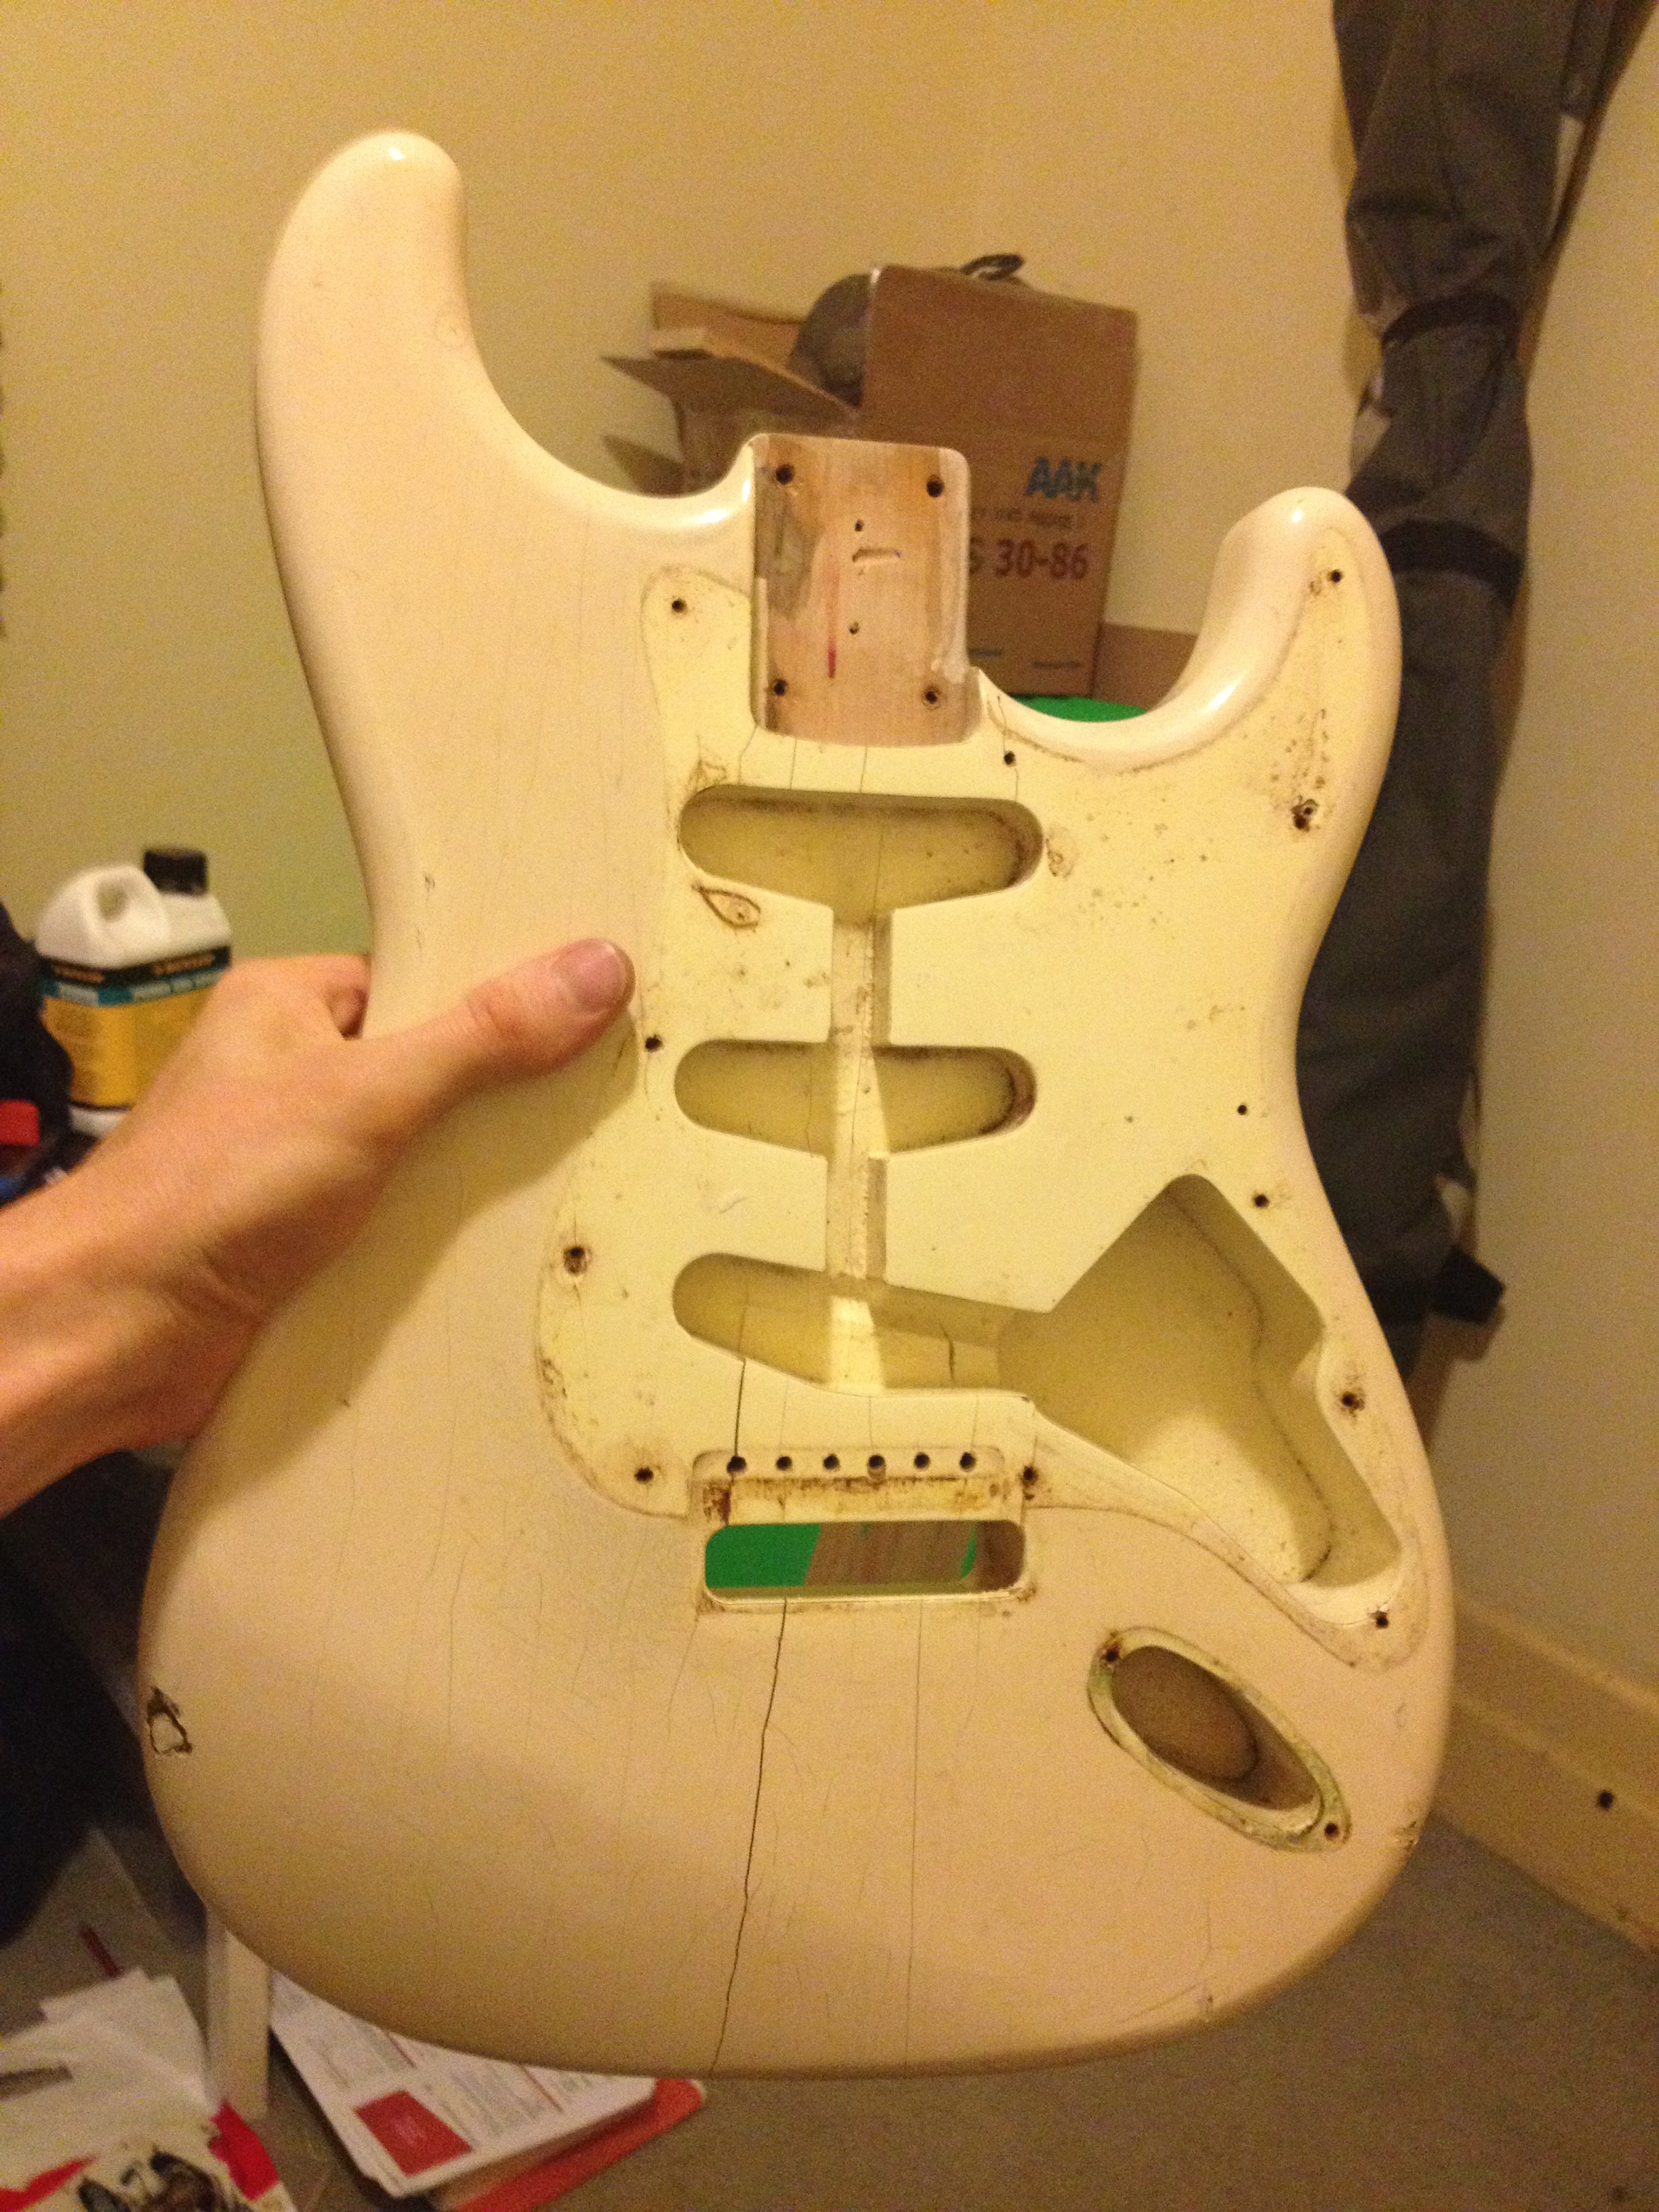
The section under the bridge – surely pushing the laws of physics to their limit.

The main crack visible prior to removing the finish.
Stripped of extraneous parts.
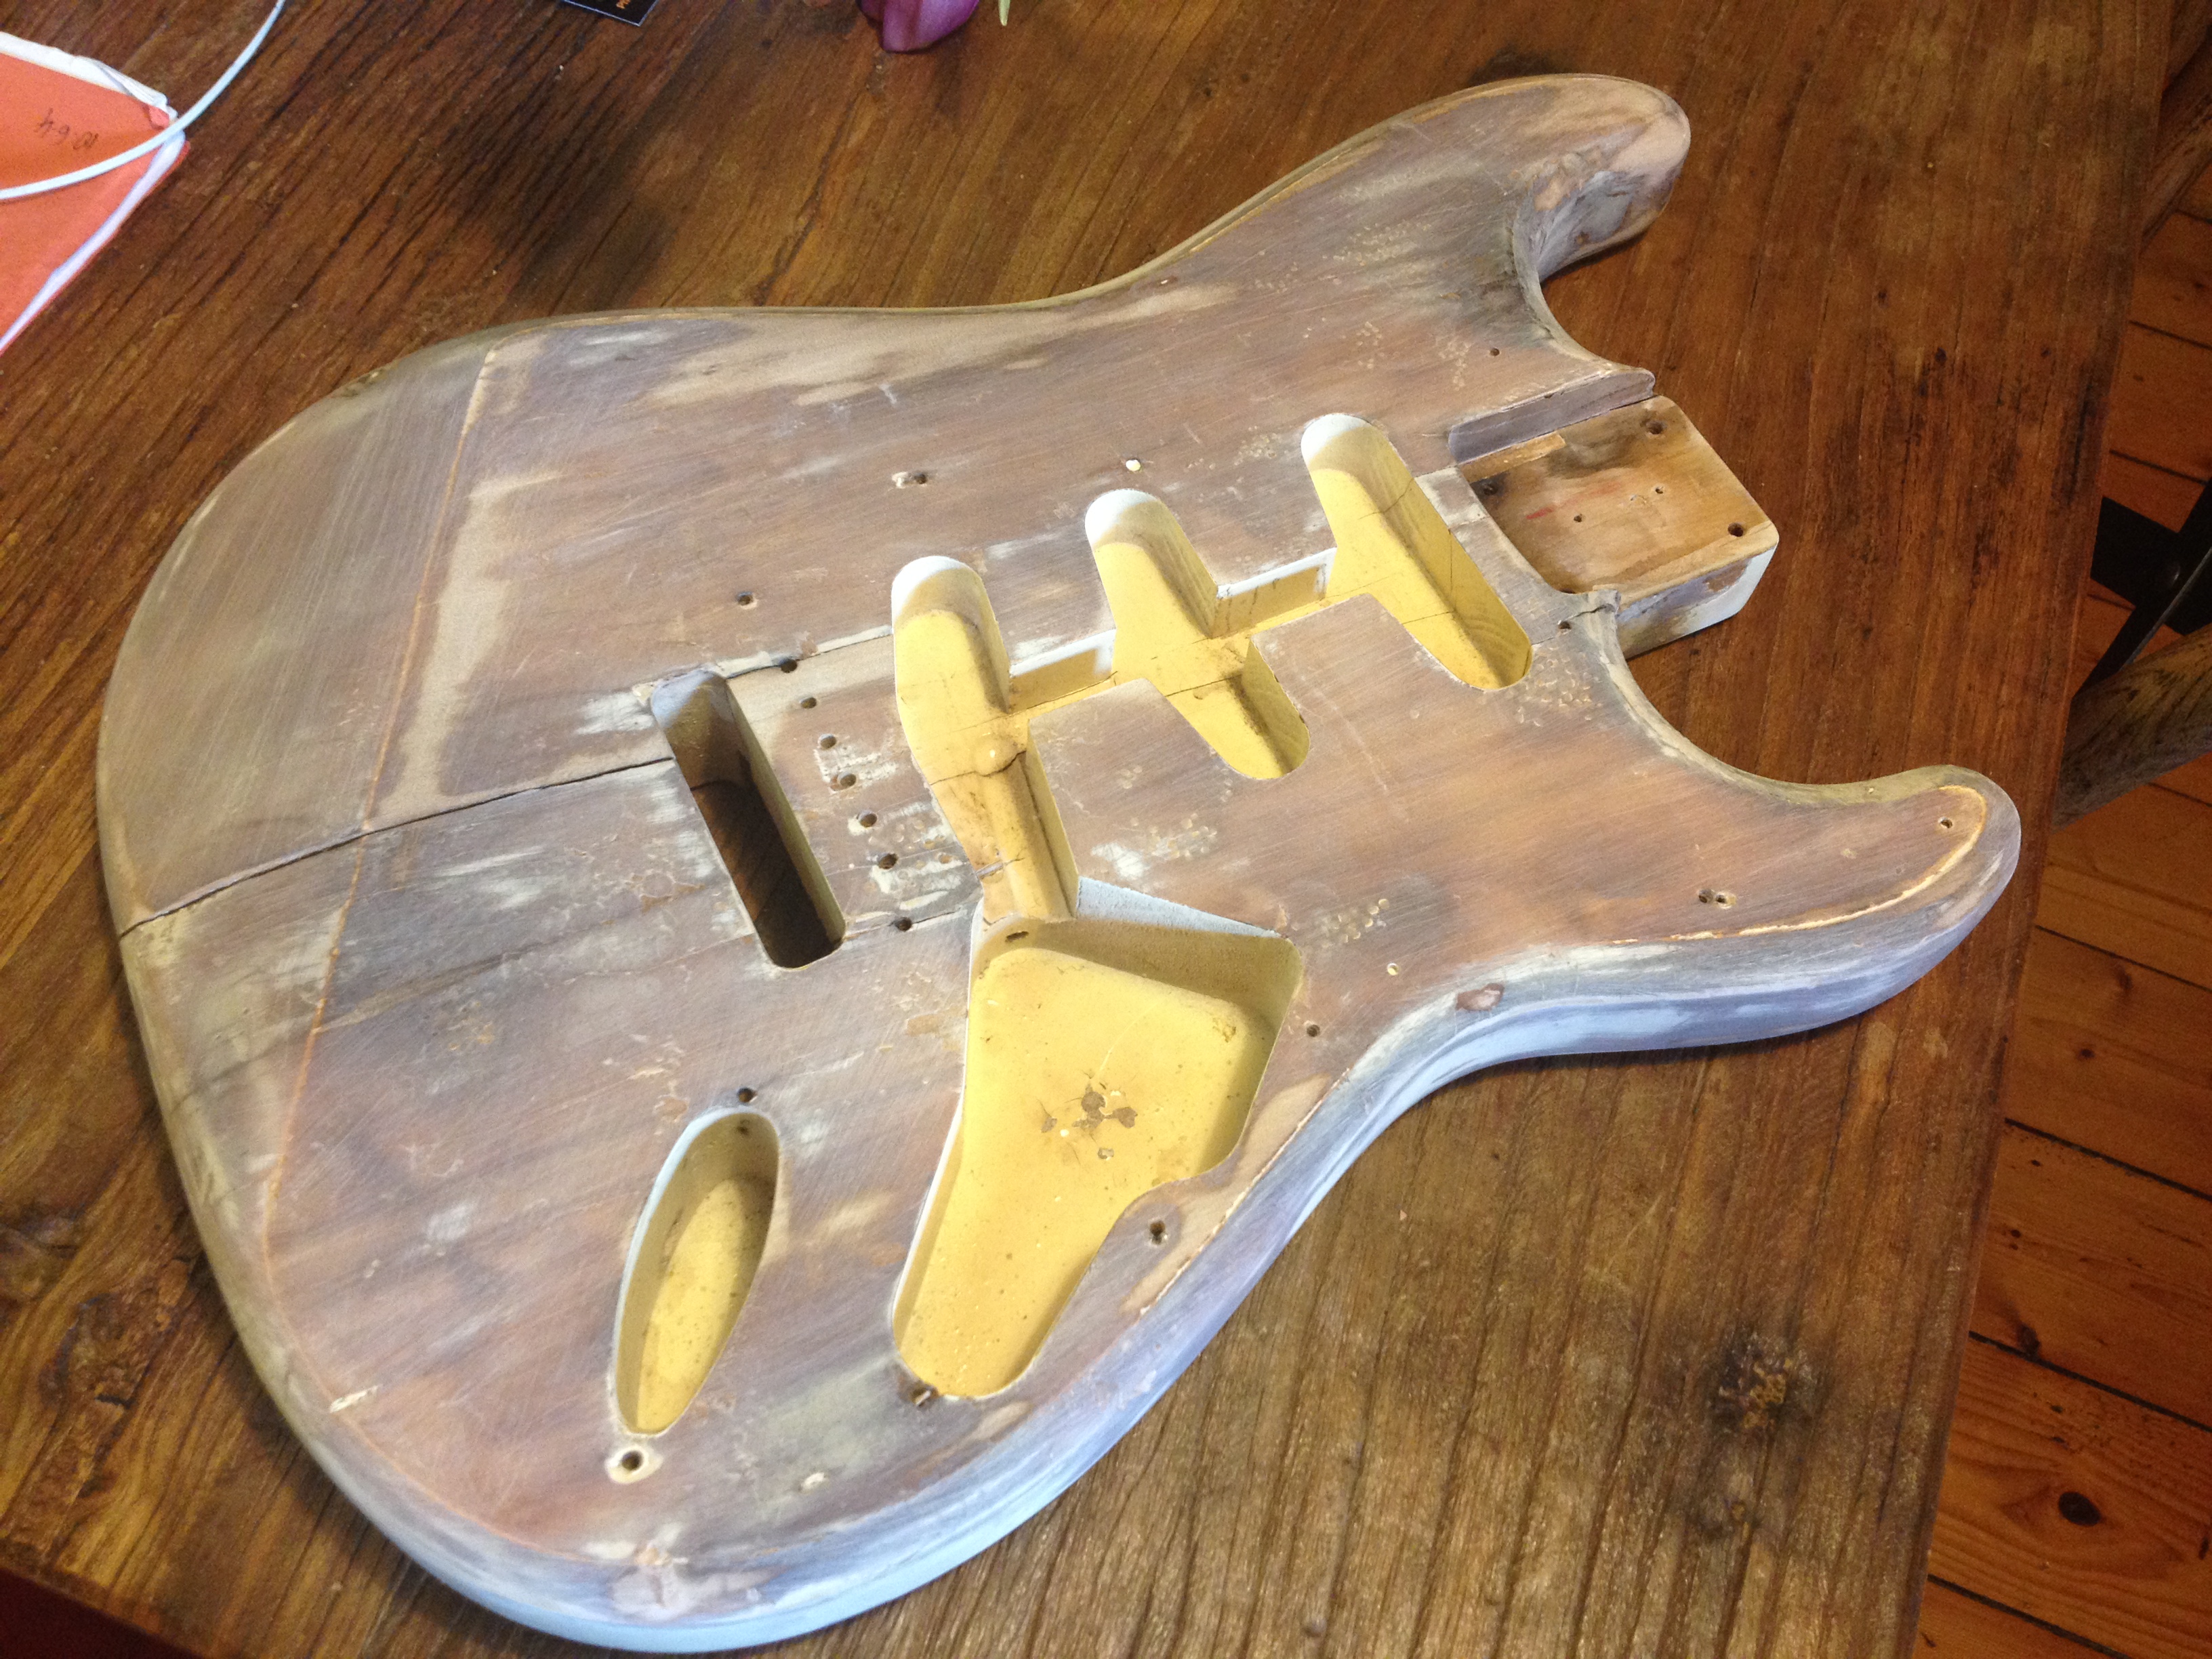
Eggshell removed. There’s still the base/sealer/coat to go, which seems impervious to heat.
The first step was to strip off that blonde finish. I used a cheap hot air gun from Bunnings and the most expensive gas mask I could lay hands on and set to work. I can tell you – this stuff is tough. I singed the wood in a couple of places trying to get it off, but got there in the end. I grew slightly weary when I discovered the use of a laminate (which I’d heard about but had been foolishly pretending I wouldn’t find) on the front and back. My woodworking techniques are generally quite Amish in approach, and as such I don’t possess a random orbital sander (or non-random sander for that matter). The prospect of sanding off a laminate by hand seemed like a chore.

Clamped.
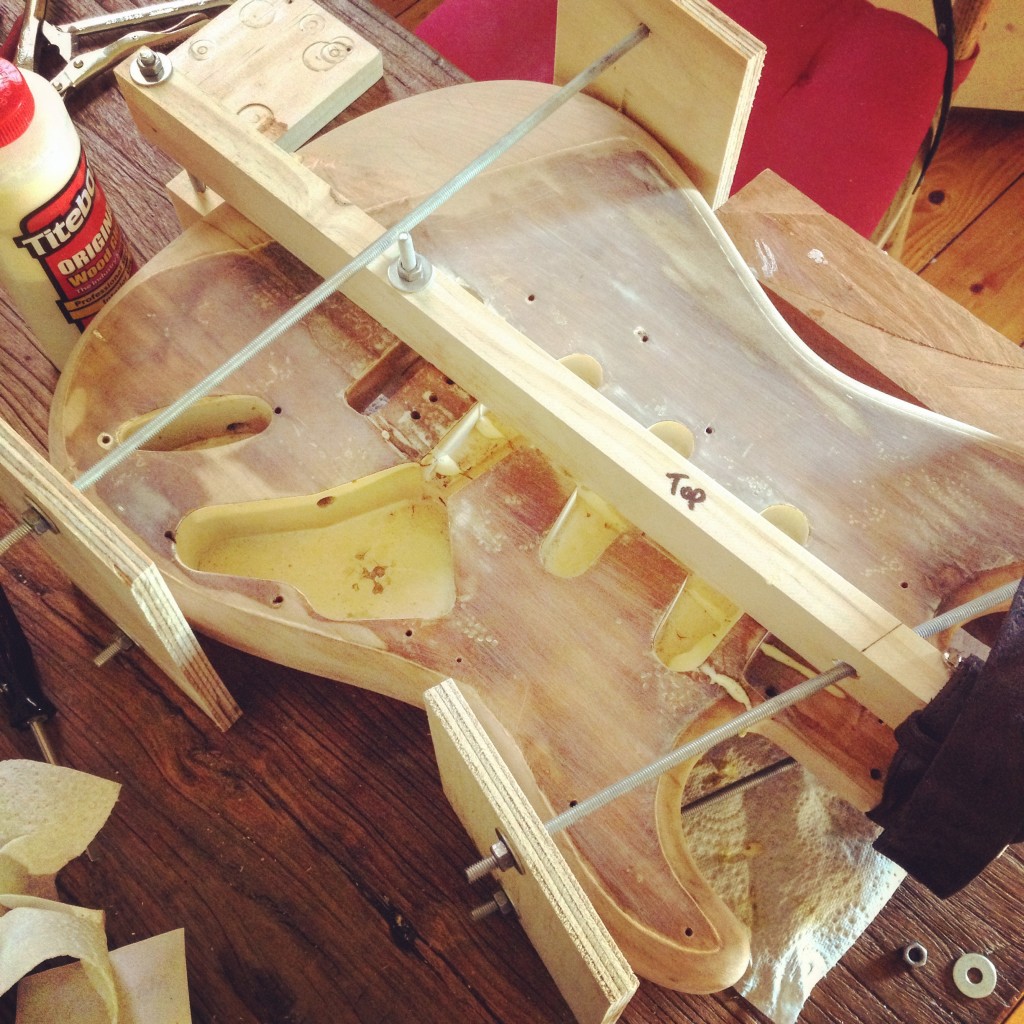
First things first though: I didn’t want to do too much sanding before fixing the cracks because different sections of the body were sitting at slightly different heights. Had I sanded with too much gusto at this point, after the repair the surface would have been all over the place.
I made a clamp out of threaded rod and a few off-cuts as per the image, to achieve Y & Z direction compression. I did a dry run of the clamp; it seemed to work as planned. To get Titebond deep into the crack (the main crack was just about body-depth) I lay the body across the edge of a step and stood on it, one foot either side of the crack while squeezing in glue. It worked quite well. For the section under the bridge it was easier to complete the break, smother it in Titebond and reassemble. On went the clamp. Tight went the nuts. Extreme went the compression. Snap! went the thread. Nothing, went the compression.
A stressful few minutes ensued while I found bits of wire, belts and all manner of things capable of going tight. In the end, it wasn’t the clamping system I had hoped for, but it held well, and was aided by the fact the wood wanted to stay together by the nature of the crack itself. My analysis of the failure: didn’t spend enough money on the threaded rod. Also, a heavier gauge rod would have more thread area than the quarter inch stuff I used, and might have held better.
End of part 1.
No Comments